KEEP YOUR DIAMOND FROM BEING SWITCHED
TIPS TO KEEP YOUR DIAMOND FROM BEING SWITCHED
This post contains affiliate links. If you use these links to buy something I may earn a commission. Thanks! As an Amazon Associate I also earn from qualifying purchases.

I can’t tell you how many times I’ve heard this over the course of 25 years.
“My Diamond Was Switched!”
A Customer will come into the Jewelry Store to pick up their Wedding or Engagement Ring from Repair or Sizing, look down at their Diamond and say:
“This isn’t my Diamond!”
Jewelers hear this all the time. And there’s a very good reason for this. Customers are nervous about leaving their Diamond Ring with the Jeweler to begin with, and when they pick it up a couple of days later, or even the next week, they scrutinize the Diamond and their Ring. And if it looks different in anyway, they’ll automatically jump to the conclusion that their Diamond was switched.
It’s True!
Customers are very fearful that a Jeweler is out to steal their stone and they’ll look at their ring with eagle eyes…
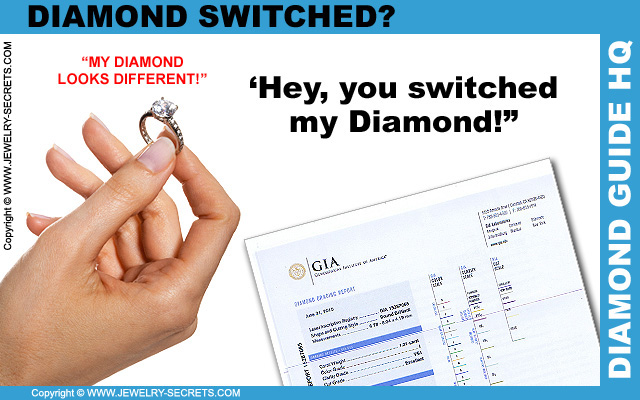
The chances are very good that the Diamond in the ring IS your Diamond and that it wasn’t swapped out. The only reason it looks different is because it’s cleaned and polished and looks new again.
Customers drop off their ring dirty and dull without giving it a second glance, and then they pick it up again all shiny and new and of course it’s going to look different. Even just rebuilding the prongs on a ring can make the appearance of your Diamond look different.
But on the very rare (Very, Very Rare) occasion that the Jeweler DID swap out your stone for a lower quality stone (always a lower quality, who would swap it out for a better stone?), there are ways to tell and there are ways to protect yourself and your stone.
And the #1 way to do that?
Use the Microscope!
This is the #1 way to protect yourself, and sadly, it’s the least used tip that anyone could do. Customers just don’t microscope their stones! :(
In order to identify your stone later, you’ll have to familiarize yourself with the stone you have today.
That means viewing the stone under a 10x Microscope (ten times magnification) and looking for unique things that can help you identify your stone. Things like: Inclusions in the stone, Black Spots that are easily recognizable, a Chip on the Girdle, a Trigon on the side…
Anything that stands out and makes your Diamond different and unique is what you’ll want to locate.
Diamonds are like fingerprints, and every single one is different and unique in nature. They all have their own characteristics and identifying marks (unless you bought yourself a totally Flawless Stone).
Your job is to find these traits, study them, memorize them. They are like Birthmarks, Moles and Freckles on people, they help to identify the stone.
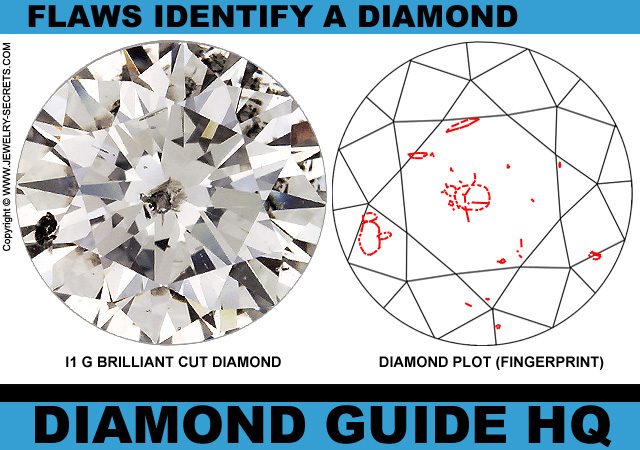
These traits will never shift, change, grow or shrink, they are constant and the ultimate way to tell if your stone has been swapped out or not. Look for your Diamond’s markings!
You can view and rotate your stone from all angles and sides, which means that the Black Spots (as an example) that you’re seeing in the 5 o’clock position (it helps to think of it as a clock), could be spun around and now is sitting pretty in the 11 o’clock spot. It’s always wise to turn your stone every time you view it, so the Inclusions and Flaws are always in the exact same spot. “Oh, there’s my Feather!“
That way, you can look at your stone under magnification, and say
“Yes! That’s my Stone!”
Viewing your Diamond when you drop if off at the Jeweler also does one important task…
It says to the Jeweler, “I know my Stone! I can Identify my Stone. I’ll know if you Switch it!“
Preventive medicine is the key!
But… And here’s a HUGE BUT…
There is one major thing you should do BEFORE you microscope your stone…
Clean it!
If you don’t clean your Diamond so it’s perfectly spotless, you’ll see tons of dirt, debris, oils, dust, hairs and crud stuck to the bottom of your stone, and these things can make your Diamond look dull, dark, dirty and full of Inclusions. It also makes trying to pinpoint those few slight Inclusions in your stone a chore (and sometimes impossible!).
View it CLEAN, and you’ll be able to distinguish the flaws from the dirt.
My Advice
This is what I advise, when you take your Diamond into the Jeweler to leave it for Sizing or any Repairs, ask them to clean the Diamond so you can both view it under their Gem Microscope first!
It sounds funny, but this is not meant to make you look silly or demanding, this is meant to protect you, and your stone!
Once clean, view the Diamond with them under 10x magnification (what Diamonds are graded with). Find those unique traits that will separate your Diamond from the rest.
Draw the Inclusions out on a Plot if you need to… like so…
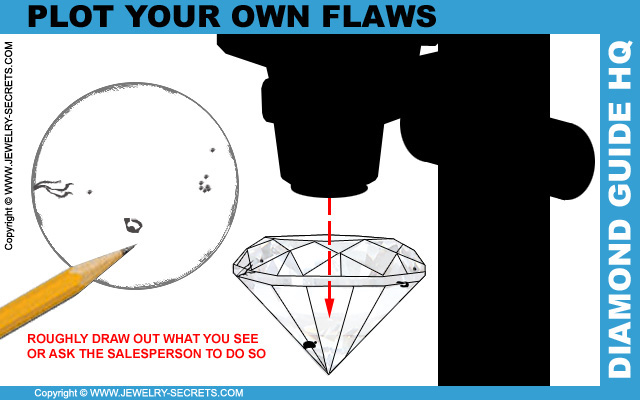
Or, kindly ask the salesperson to help you draw out a quick plot of the Diamond for later reference. A good place to do this on, is the back of the repair slip. :)
The funny thing about doing all of this is the fact that it also Protects the Jeweler. They can prove that they didn’t Switch your Stone simply by showing you your Flaws against the Plot. Plus, it also helps point out things that they may have missed if they wouldn’t have viewed the stone, like a Chip in the Side of your Stone.
Catching this now will keep you (the customer) from blaming the Jeweler for chipping their stone. Always a huge plus! Every one wins by taking the time and effort to view the stone before any work is done. I’m actually surprised that this isn’t company policy in all Jewelry Stores. It just makes sense!
When you get your stone back from Sizing or Repair, don’t just walk out the door with it… Ask to see the stone under the scope again.
If you don’t, this whole ordeal is for nothing!
View it BEFORE and AFTER to verify that the Diamond you dropped off IS the Diamond they’re giving you back.
But, there are even MORE (and Accurate) ways to identify your stone…
Certification
Certification is where your Diamond has been Certified by an outside Certification Company (not the Jeweler) who has detailed and graded your stone for Shape, MM Size, Carat Weight, Cut, Color and Clarity. Not to mention other characteristics like Polish, Symmetry and Fluorescence.
All of these Traits Identify your Exact Stone to a T.
The better the Certification, the more accurate the grade is, and the easier it is to identify your stone.
The two best Certificates to own in the world are GIA (The Gemological Institute of America) and AGS (The American Gem Society).
These are very strict grading reports, and very admired in the Jewelry Industry. GIA actually wrote the book on the 4C’s! They developed them and set the standards that everyone else across America uses to grade their stones with.
I would trust these gradings above any Certificate out there.
By looking at the info on these laminated reports, you can identify every aspect of your stone and know if it’s been swapped out by an unscrupulous Jeweler.
You can measure the Width and Height of the stone with a Leveridge Gauge and see if it matches up to the mm on the report.
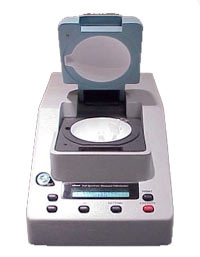
You can put the Diamond on a Colorimeter (see right) to verify the Color Grade of your Diamond. Most Jewelers have these available to show you…
You can look at the Diamond Plot of the stone (on a Full GIA Diamond Report), to see if the Inclusions, Clarity and Flaws that are mapped out by an Expert Diamontologist are there.
Look at the official Plot, then view your stone under a scope to find those exact characteristics under magnification. A Salesperson can help you with this.
If your stone is Certified, then you have proof of what your Diamond was when you dropped it off.
Take your Certificate with you to look at and verify when you drop your stone off. Just don’t leave the actual Certificate with them (they can make a copy of it if they like). This Report is yours and your only means of identifying the stone. Take the Report back with you when you pick up your stone to view it and verify it again. Refresh your memory about your stone and where the Inclusions fall.
If you want to protect your investment, and your Diamond, you have to take the initiative.
But, there is one more way to identify your Diamond… And it’s an easy one!
Laser Inscription
Certification Companies like GIA, make identifying your Diamond a cinch… That is, if you buy a stone that’s been Laser Inscribed. :)
This Laser Inscription will be etched directly onto the edge of your Diamond. The actual Diamond Report Numbers will look something like this on a GIA Laser Inscribed Diamond…
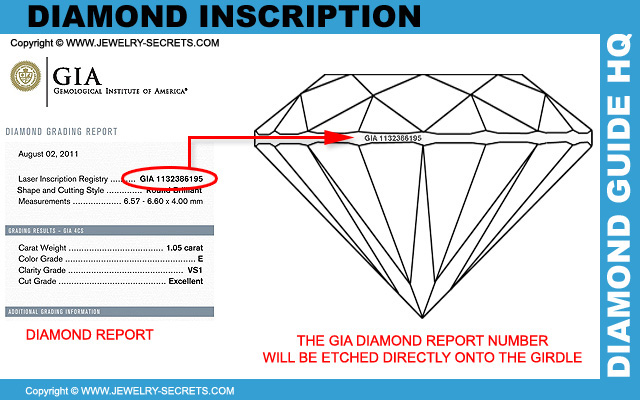
That way you can look at the Report Number on your Certificate, and view the Diamond under a Microscope to verify those exact numbers.
You’ll have to turn your Diamond on the side to see the Inscription numbers etched onto the Girdle.
You may also have to rotate your Diamond around until you spot those Inscription Numbers. They are very small, and pretty difficult to locate.
Sometimes I’ll find myself spinning the stone around a couple of times before I spot those tiny little numbers. They are that small!
It does help greatly if you view the Diamond under a higher powered magnification as well. Like 30x magnification. Many Jeweler’s Gem or Diamond scopes have the capability of doing this. It makes it much easier to see the Inscription. :)
Laser Inscribed stones are the easiest stones to identify. Every Inscription is unique and they identify that stone with that report. Viewing these will tell you in a second if a Jeweler has switched out your stone for a different Diamond.
Preventive Medicine
Sadly, this is all fine and dandy if you did all of this BEFORE your Diamond was switched…
But, unfortunately, people tend to learn the hard way. They only seek out advice AFTER the damage was done.
People may suspect that their Diamond was switched, but without viewing it first, or without having a detailed Diamond Report to prove otherwise, I’m afraid it all comes down to speculation. Your word against theirs!
You may be able to prove that the Diamond you get back is a different Color or Clarity than what your Appraisal or Receipt says, but it doesn’t do you much good, and here’s why…
It still doesn’t prove that THAT Jeweler swapped it out!
All it proves is that someone, somewhere along the line swapped it out. It could have been done by anyone at anytime. It could have been done 10 years ago when you first had the ring sized. It could have happened during a recent Mounting Upgrade or a Prong Repair…
You just don’t know!
For all you know, your husband could have swapped out the stone without you knowing just because he needed the money. It’s happened before!
In fact, you can’t even prove that the Diamond you bought in the first place, is actually the Diamond they said it was. The Appraisal and Receipt could be wrong!
You see where I’m coming from?
It’s all Questionable!
This is why a Certified Diamond comes in handy. It’s the best way to prove that a Jeweler actually did give you a different stone. It’s being prepared before hand. You really MUST view your stone when you drop it off, compare it with the Certificate, and view it again when you pick it up.
It’s your Diamond!
It’s your Choice!
It’s the only way to fully protect yourself (P.S. Make sure you have your Diamond Insured, just in case).
Take the time to do it NOW!
Trust me, the last thing that any Jeweler wants to hear is:
“This isn’t my Diamond!”
GROAN!!!!!












Leave a comment