PHOTOGRAPHING JEWELRY FOR ETSY
TAKING GREAT PHOTOGRAPHS TO SELL JEWELRY ON ETSY
This post contains affiliate links. If you use these links to buy something I may earn a commission. Thanks! As an Amazon Associate I also earn from qualifying purchases.
Etsy is such a HUGE Market for Handmade Jewelry!
They have some Incredible Artists, who make the Coolest and Most Awesome Pieces!
I Love Etsy (if you’ve never taken a look at Etsy, do so!), I’m always searching the Jewelry Galleries for Neat, Crazy, Bracelets, Rings, Earrings, Pendants, Tie Tacks, Cufflinks, Watches, Belly Button Rings, Charms and the such. It’s Pretty Endless!
But one thing that I always notice (since I’ve been in the Jewelry Industry for over 25 years, and am a Graphic Designer and Create Jewelry Ads), are the PHOTOS!
Some of the Photos, Oh Heck, a GOOD PORTION of the Photos are Blurry, Dark, Grainy, and don’t do the items Justice. That’s SAD!
Take a Peek (Not pointing Fingers here, just Giving Examples)…

See!
Photos like those probably won’t sell a lot of Jewelry. People would just Scroll by them without taking a closer look…
It really is Sad, because some of these items are WONDERFUL items, but without a Great Photo, they will probably Lose out, and maybe Never, Ever Sell the Piece.
It’s true!
PHOTOS SELL!
Taking the time to get a Great Looking Photo, that’s Crisp, Clean, Bright, and Detailed, is PRICELESS!
It can Make you Money!
Your Sales will Increase for SURE!
I know!
I Photo Jewelry and make Advertisements almost Daily. I know how Difficult Jewelry is to Photograph. They’re Small, Reflective, Sparkly, Translucent, and Detailed.
Without the Proper Equipment, and even some Photoshop Skills, the Pictures just don’t stand out.
It is almost MIND-BLOWING how different a Piece of Jewelry can look with a Good Close-Up Photo and some Enhancements.
Good Lighting is KEY!
For Example… Look at the images below that show Before and After of some Items I’ve Cleaned up for Ads…
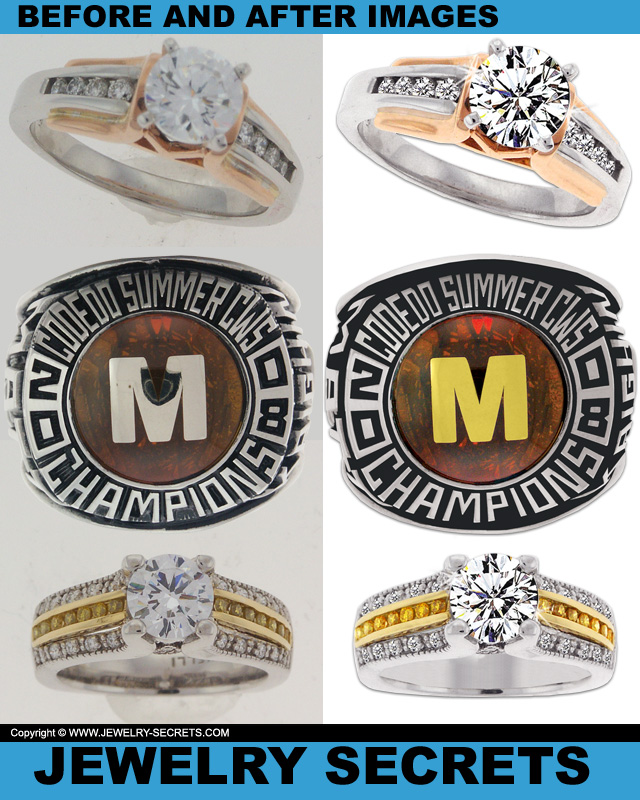
See! Which items do you think would Sell more?
There’s no Question…
So, how do you Photo Jewelry for Etsy?
(or Ebay, or Craig’s List)
Well, you start with the Right Camera. That’s the FIRST STEP. Now you don’t need an Expensive High-End Camera. You just need to get one that has a Good Optical Zoom (Note that’s “Optical Zoom” and not “Digital Zoom“).
To be able to get Close to the Gems, Diamonds, Rings, etc, you need a Good Zoom. I use 7x (which was HIGH at the time) and I would recommend that, or higher, like 10x.
An Optical Zoom brings the item Closer without Distortion!
This gets the items Big enough and close enough to photo for Print Ads, and certainly big enough for Web Images (which are actually low-res).
The Camera I use is an older Camera (probably 10 years old), it’s a Minolta Dimage 7i 5MP Digital Camera w/ 7x Optical Zoom. Nothing Great, Nothing Fancy, just enough to get the job done RIGHT!
Once you get a Camera that has a Good Optical Zoom, along with a Telephoto Lens (My Lens has an Aperture of 28mm-200mm), then you need to get yourself (or make yourself) a Photo Light Box.
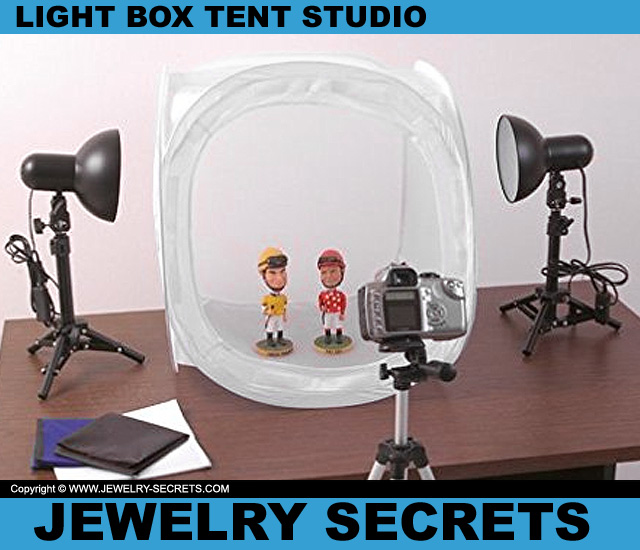
When I started Photographing Jewelry ten years ago, a Light Tent with Lamps, like the one shown below, was Recommended…
I tried that. I didn’t like it!
It had too many parts to transport. Too much to set up. HOT Bulbs (you bump the LAMP and the Light Breaks), and lots of Equipment to move (since I needed a Studio that was Portable, this setup just didn’t work). So I decided to get something much, much EASIER… A Photo Light Box! (Mine’s about the size of a Small Microwave)
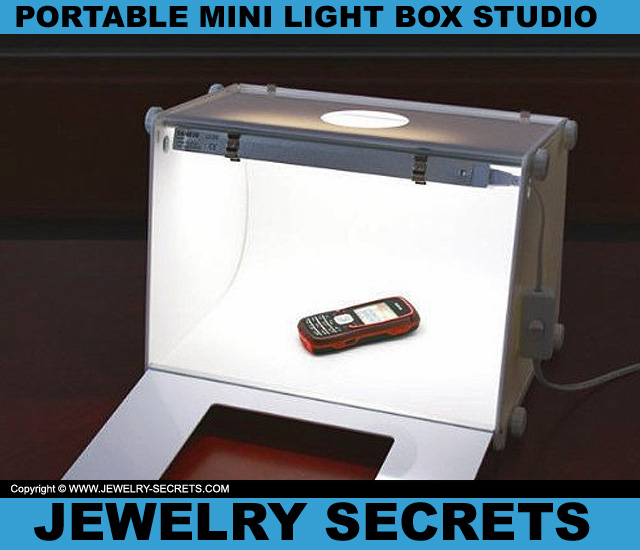
Like the one shown here…
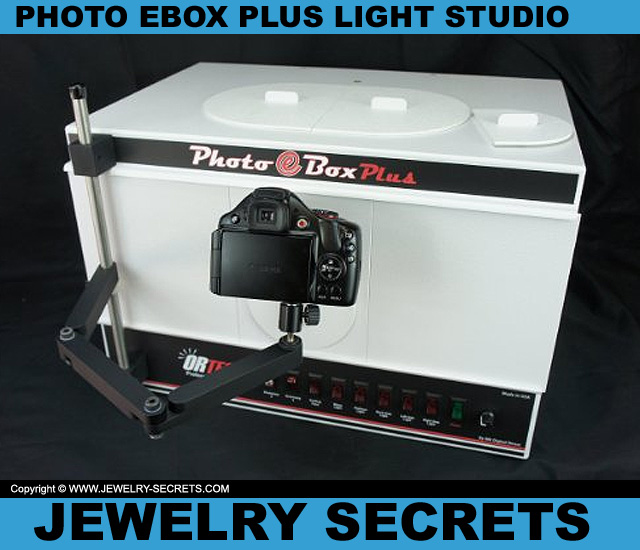
And here…
THOSE WORK GREAT!
They have Daylight Bulbs inside the unit that removes Shadows and Background Color from your Jewelry. And, they have Openings in the Top and Side of the Unit for Photographing Straight Ahead, or from Above. You’ll LOVE it!
A Light Box will change your Jewelry from Yellowy, Old, Antiqued Pieces into Bright, Clean, Detailed Items. It’s a Day and Night Difference!
And I do suggest that you use a WHITE Background (Versus Black, Blue, or something totally Crazy). White makes Jewelry POP! Especially if it’s a Colorful Item with Gemstones! WONDERFUL!
If you do use a Background, that’s also fine, but don’t make it Distracting or something Too Busy that the item gets LOST.
Simpler is Better!
Also get yourself a Tri-Pod for your Camera, unless you buy a Photo Box that has a Tri-Pod attached like the Photo eBox. This makes taking Photos even Easier! (A Tri-Pod keeps the Camera from Shaking and Taking Blurry Photos).
With Close-Up Items, even your Breathing is enough to throw the piece out of Focus. Not Cool! Get a Tri-Pod, it’s a MUST!
Turn the Lights on, put your Camera on the Tri-Pod, set the Timer for 10 seconds, and stand back. That way your Photos will turn out Crystal Clear every time.
Just make sure you take MANY Photos, focusing on different areas of the item, so you get the Exact Photo you want.
Move the item around and take it from different Angles and Levels. Plus, I also highly recommend Holding Wax. Holding Wax is where you take a Small Piece of Wax, and stick it underneath the item, such as a Ring, and it will HOLD it in place so you can Photograph it. That way you can Prop up the item at the Right Angle and it will STAY… So you don’t have to lean it up against something, or hold the item with your Fingers!
It works, and it works well!
Keep in mind, when you’re taking Close-Up Photos, only one section of the item is in Focus at any given time. Like the Top of the Ring will be in Focus, and the rest of the Ring (the Band or Shank) will be Blurry. This is normal when taking macro photos. There’s not much you can do about that except concentrate on the best area and make sure that’s in Focus. Me, I’m tricky when I make my Jewelry Ads… I photo the Top of the Ring AND the Bottom of the Ring separately, and then SLICE them together to get one image that’s totally in focus. It’s more work, but it pays off. :)
That’s if you’re Familiar with Photoshop and how to do such Imagery.
NOW…
Take a Good Number of Photos of the item: Top, Side, Bottom, make sure you get any Stamps in the item as well. Close ups of the important areas… so the Buyer knows exactly what they’re buying (Etsy allows you to put many photos online to show off the product). DO SO! The more Photos you have, the more chances you have at selling it… There’s nothing more frustrating then seeing a really great looking Bracelet, but there’s no photo of the Clasp or how it Hooks. Don’t be this person!
Photo Everything!
Once you take all the photos you need. Transfer them to your Computer. Look at them one at a time and move the GREAT photos into a Folder on your Desktop. And then, if you need to, or want to, open them up with a Graphics Program (I use Photoshop), and Crop the item, Resize the item down – Usually around 1000 pixels or less is sufficient for the web), adjust the Brightness, Contrast, Hue and Sharpness… And you’d be AMAZED at how much better you can make them.
Once you have the Photos, you still have LOTS of work to do.
You have the Descriptions, Titles, and Specifics, which are all VITAL to selling on Etsy.
The Title needs to be Detailed… Which means, you can’t just say “Lady’s Pendant“, it needs to be more descriptive like “Lady’s Stainless Steel Daisy Flower 22″ Pendant“. That says a lot. That tells the viewer what to expect, PLUS, it also tells GOOGLE what to expect (so you show up in Search for that item).
Now fill out the Description WELL!
This is a Bad Description:
“Lady’s Ruby and Diamond Ring, Size 7.”
This is a Great Description:
“Featuring one Ladies Stunning Ruby and Diamond Ring. The Mounting is Two-Tone, combining both 14kt Yellow Gold and White Gold in a Custom Designed Band. The Beautiful Ruby is Tension-Set in the Center of the Mounting, 2.00 Carats Total Weight, with MI Clarity (Medium Included) and Strong Vibrant Hues of Deep Rich Red Tones. Prong-Set in the Mounting are also Two Single-Cut Diamonds totaling .20 Carats Total Weight, SI Clarity, G-H Color. This Ruby Ring is a Size 7, Solid and Heavy, but very Comfortable to Wear. The Mounting Weighs 4.5 Grams and comes in a Cute, Little Gift Box. Ring is Pictured, and there is only one of them, so Order Today!”
I would suggest you Add as much Detail, Story, and Personality as you can. Make sure you hit all the key points like:
- Ring Size
- Gemstone
- Genuine, Imitation, Man-Made
- Gem Size and Measurements
- Length and Width of Item
- Metal Type
- Hypoallergenic?
- Gift Boxed?
- Shipping?
As much as you can think of, ADD. It doesn’t HURT, but it does HELP!
Also state if the item is Handmade, Cast, Recycled, Vintage, Plated, One-Of-A-Kind… and if you’re actually getting the item shown, or if they are made to order (hence Colors and Stones may be different).
State if there are any Imperfections, Bumps, Dings, Scratches, Chips in the Stones… EVERYTHING! You don’t want the person to get the item and be upset (“Hey, this isn’t PURPLE!“)
Be upfront and honest in your Descriptions. Leave no SURPRISES!
Some other Great Tips, Tricks, and Pointers…
If you don’t have “MODEL” hands, don’t put your Hands in the photo! (I’ve seen Dirty Nails in Photos… That’s NASTY!)
Etsy displays the items in a Gallery that’s Cropped. So keep the Photos Simple. You want the people to view the Gallery and instantly know what your item is. “Are those Cufflinks, Earrings, or Ear Plugs?”
If you can’t tell, you haven’t Photographed the item good enough, or at the Proper Angle.
Don’t lay your items on a MIRROR either! Mirrors double the item and you can’t tell where the item ends and the reflection begins. It makes it too Busy and too Confusing.
And make sure BEFORE you Photograph any item that you look it over closely. Wipe off ALL your Fingerprints, these SHOW UP in Photographs! I’d suggest you use a 10x Jeweler’s Loupe and look at the item well. Make sure that your Jump Rings are Aligned Properly and that they are Fully Closed! Things like these stand out Horribly in Photos!
Something else to note, if the Pendant is on a 30″ Long Chain, you don’t need to stand 50 feet away from the item to get the entire object in view. Taking a Closeup of the Pendant and a little of the Chain is good enough. Just make sure you state how long the Chain is in the Description, and maybe Photograph the Clasp so they can see how it Hooks.
Some GREAT EXAMPLES of Jewelry on Etsy that WERE Photographed right, are shown below! You’ll see that they all vary, some do have backgrounds… But they all look PROFESSIONAL and are LIT well!

Those are AWESOME Photographs and the Artist will probably sell tons of Jewelry!
In fact, many of these look just like the Photos that National Jewelers use…
They Photo all their Goods on a White Background with Bright Lighting as well…
See Examples of Both Helzberg Diamonds and Kay Jewelers Below…
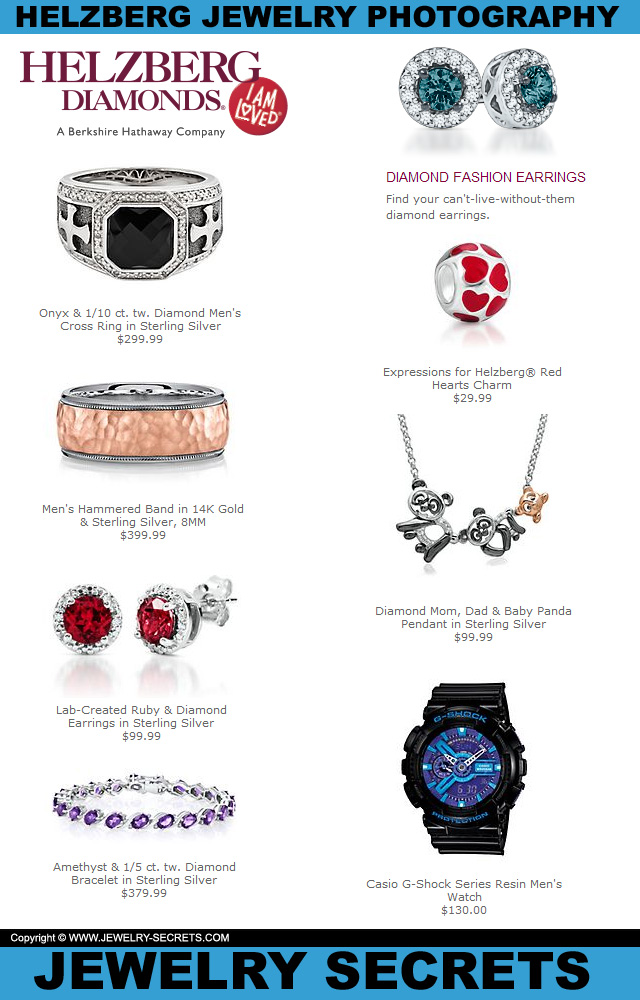
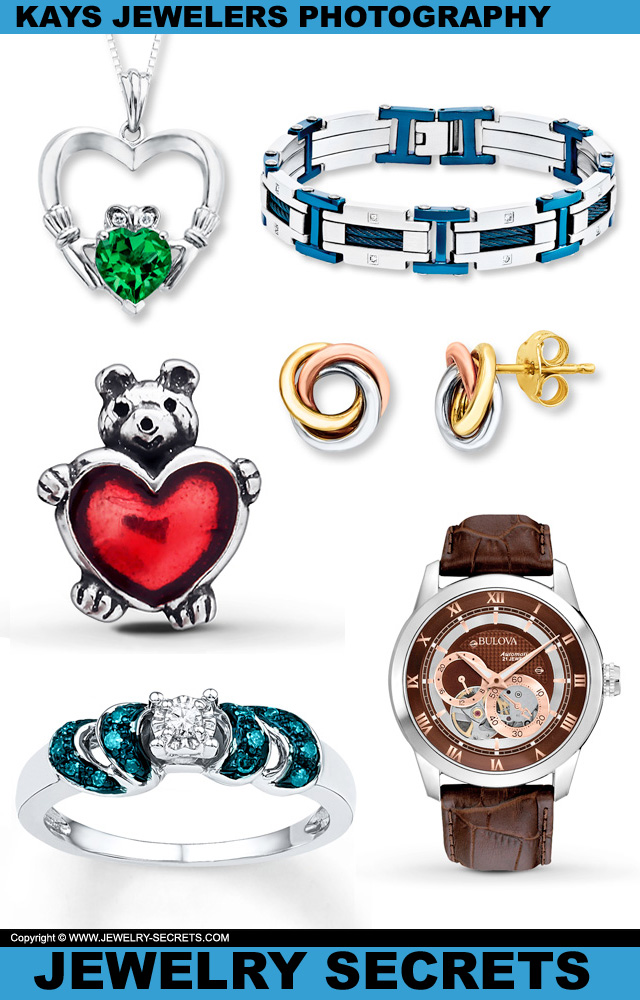
Those are EXCELLENT and the items look Wonderful!
So invest in a Nice Camera and a Light Box. A setup like this can really take your Etsy Store to the next level. Pictures ARE Worth a Million Bucks!
And do make sure you fill out the Artist Bio with a picture of yourself so your Customers see WHO you are and what you look like. Things like this can really Make or Break you.
If you leave a Lasting Impression (like a Handmade Thank You Card in the Package), your Customers will certainly become REPEAT Customers and pass the word.
So Good Luck with your Store, and Happy Snapping PHOTOS that SELL! :)





Perfect explanation and detailed demonstration by highlighting each picture about its perfection or mistakes. Definitely photos makes lot of deference for understand the product and help make a purchase decision..blog worth bookmarking and visiting again ..
Who knew? All I was looking for was a watch battery conversion chart and lo and behold I found what is now one of my favorite sites! I’d have to set aside an entire day to read all of your great info and tips which is A-ok with me. I look for great jewelry in thrift stores and then take everything apart, sort and voila! A healthy inventory I use to create all kinds of ‘new’ things. Amazing how many tarnished sterling chains and charms folks discard. Taking photos is challenging but now I’m learning all kinds of ways to do it right. I have used a white background and drape a piece on one of my geodes. My son has found a couple sizeable rocks out in the desert in the Phoenix area – SO fun opening one to behold the ‘treasure’ inside! Definitely an example of ‘don’t judge a book by its cover.’ Thanks ever so much.
Thank you Andrea. That’s very kind, happy you like the site. :) -Richard