HOW TO RE-GLUE YOUR PEARL
IF YOUR PEARL COMES LOOSE, HERE'S HOW TO GLUE IT YOURSELF!
This post contains affiliate links. If you use these links to buy something I may earn a commission. Thanks! As an Amazon Associate I also earn from qualifying purchases.
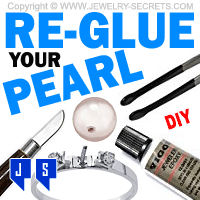
Pearls come loose…
A LOT!
Especially from rings, since they are often getting hit, bumped, knocked around. Or if they get submerged in water or get wet. Pearls are organic, and water makes them expand and come loose.
So many people look down at their hands and see that their pearl has fallen out, spins in the mounting, or is just plain missing.
Not Good!
(Which is why you should check your pearls often to make sure they’re tight and don’t twist)
Now, you could take this ring (or pendant or earrings), into a jewelry store, drop it off to them and pay to have them re-glue your pearl…
BUT WHY?
When you can do it yourself.
Not only can you DIY, but it’s pretty simple, doesn’t cost much, and saves you a trip to the jeweler (plus, it only takes a day, versus 2 weeks to repair).
So let’s get to it, this is how you reglue your pearl:
1) Chip off the Old Glue
This is the most important step (and delicate). You’ll need to be ultra careful and chip off the old glue (which is probably yellowed and brittle). You’ll need to grab an object like a bench knife, or a pocket knife (swiss army’s work fine), and (without harming the soft pearl), pick off the layers of glue. Don’t pull too hard, and don’t dig into the nacre (the shell of the pearl). Pearls are very soft (a 2.5 on the Moh’s Scale) and will scratch easily, so be cautious when you try to remove the old mounds of glue.
A small blade, even a watch case opener will work, to gently break the excess glue off. Just go slow and steady, for if you damage or nick the pearl in any way, it can not be repaired! (but you can buy a new pearl to replace it!)
2) Clean the Jewelry!
Most pearls have a hole in them that drops down over a post (to help hold it in place). The pearl is actually glued onto that post, and the post (and the base of the jewelry; a cup, head, or basket) will often contain excess glue as well.
This all needs to be removed. The pearl will need a clean contact to not only hold fast in the mounting, but not leave gaps or stick up higher because of the old layers left behind.
Pull or crack this dried glue out of the metal and from around the post. Then clean the jewelry to remove any dirt or debris so the areas are as clean as can be. Ultrasonic Cleaners are great for this, just don’t put the pearl in! (only the mounting)
Now place the pearl onto the jewelry, just to make sure that the fit is flush and ready to go (before you glue it).
3) Get yourself some GLUE
They sell special jeweler’s epoxy glue that is made for glueing delicate objects like pearls. Not only is it durable, clear, but it won’t harm the stones, and creates a very strong bond.
You can use super glue if you wish, but super glue is more liquidy and tends to go everywhere (including your fingers).
Put some glue in the pearl hole (use a toothpick if necessary so it doesn’t run about). Put a little glue around the base of the pearl too, but only where the pearl will actually touch the mounting.
Put more glue (not too much) onto the jewelry itself (where the pearl will rest)…
Then, put the pearl onto the post and squeeze it into place. If glue squishes up around the edges, quickly wipe it away (otherwise it will dry like that and become quite noticeable).
4) Press the Pearl Tightly
Apply constant pressure to the pearl (holding the top of the pearl and the the base of the ring and squeezing together. Hold it in place until the glue has dried (jewelers often use pearl tweezers, a wedge, or even a clamp or bench vise to hold the pearl while it dries). If you use a vise or clamp of any sort, make sure you put some kind of padding or towel in between the vise and the pearl, just so you don’t leave any marks or dent the pearl in the process.
5) Don’t Touch It!
Your pearl jewelry is not ready to wear. It needs to sit for at least 24 hours for the glue to dry totally. This gives the item time enough to harden, cure, and create a lasting bond.
That’s what jeweler’s do. It’s pretty quick and simple; if you have the right tools:
Added TIPS to keep your Pearl Secure:
- Avoid getting it wet. Take your ring off when you do the dishes or shower.
- Don’t get lotions, creams or detergents on the pearl.
- Wear your pearl often, so it doesn’t yellow or dry out (pearls love the natural oils from your hands).
- If your pearl comes loose often, you might consider adding prongs to the piece to hold it down.
Now your Pearl is Safe and Secure!
Better staying in place, then rolling on the floor.
Check out some of the beautiful pearl jewelry here.
Cheers! :)










Leave a comment